All Through The Night (Ar Hyd y Nos) – Welsh Traditional Song – Guitar & Ukulele TAB – Public Domain

Photo by Felix Mittermeier from Pexels


The arrangements should be playable by grade 1-2 level students.

As I teach in Wales during my working week, some of my primary school students have been learning this tune on guitar or ukulele to play at school events to mark St. David’s day.

By some, the song is considered a traditional Welsh Christmas song. I’m not too sure on this, but it says on wikipedia here: https://en.wikipedia.org/wiki/Ar_Hyd_y_Nos

2017 update: Now includes a lyrics file.


Guitar:


Ukulele:


Lyrics:

11 tips and advice for running your own guitar or ukulele teaching business

Photo by rawpixel.com from Pexels


Whether you are thinking of starting your own music leaching business, or looking for ways to improve the management of your self employed music lessons business, these 10 tips have been written with you in mind. All of these bits of advice are related to my own business and are things that I do or have learned throughout the 6 years of teaching music in schools and doing private lessons, while being self employed and organising everything else involved outside of the actual teaching.

1. Plan your week with a digital calendar

Easily manage your schedule online and sync it to your mobile devices. Reschedule lessons on the move and set reminders to pop up at certain times if needed. The main advantage of a digital calendar is that you can schedule recurring lessons to be the same every week, and then modify each one individually if you need reschedule for one week – saving you lots of time writing in the same things into your calendar each week. I use google calendar and sync it with my phone’s calendar.

2. Get a digital to do list

A todo list that syncs to your phone, like Remember The Milk, is very useful and can help build up your reputation of someone that is reliable, because you will actually follow through with the things you say you will do. There is always something that crops up in the day that needs to be addressed at a later time. A busy music teacher can have hundreds of little tasks in a week that crop up, and adding them to a todo list will make sure they get done. Tip: On super busy times, sometimes I do ignore my to do list so I email myself absolute must do things so I can’t ignore them.

3. Organise your lesson plans and content

Structure your teaching into ability levels and topics. Make sure you are covering everything that you should be teaching to the best of your knowledge. Create lesson plans or exercise sheets, or compile ones from books or online lessons. Keep digital files and print as needed. I keep my files in google drive so I can use them on the move. Don’t hand write everything in your own time unless you are only doing it once and photocopying it for future lessons. You should end up with more content than you can carry with you at once. Therefore you might want to structure lesson material into different topics throughout the year, or use or create a series of books that the students can progress through.

4. Use books and booklets rather than individual lesson handout sheets most of the time

If creating your own lesson plans, try to compile them into a book or booklet that can be printed out and stapled or binded together, or used as an ebook. This will mean you won’t need to worry about printing off new lesson handouts every week or so. Even better, the student will be able to visualise their progress as they make their way through the book. Furthermore, you could think about selling your books online. It can be a nice way of passively bringing in an extra income while you are doing other things. I use a company called Payhip to sell my ebooks and premium downloads.

5. Offer to teach grades

Working through a grade book is a good way of learning and teaching. Make sure you only teach grades that you could do yourself. You should always be at a higher grade than what you are teaching, and ideally be several higher.

Grade 6-8 award ucas points, which are a good incentive to start learning early and have dedication to progress up through the grades before university age, where extra ucas points might prove useful.

6. Dress smart and be professional

If you take your job seriously and want your students and parents of students to take you seriously then I believe you need to make the effort to look smart whilst working. You might also be a musician and have a strong image as well, but it is best to save certain things for the stage. Being your own boss is great so you don’t have to, but people feel more comfortable if you make the effort with your appearance, especially if you work in schools as a peripatetic music teacher.

7. Make sure you work enough hours per week

Music teachers can charge much more than minimum wage, which is great unless they don’t do enough billable hours. To make this job pay a decent wage you need to make sure you are putting full time hours during term time at least. It is easy to fall for the illusion of charging a high hourly rate, and working part time hours, only to end up with a low income at the end of the year.

8. Have music related goals and activities outside of your teaching

Keep your dreams, goals, ambitions and love of music alive. You might downsize them as the years pass by, but always remember why you play your instruments and do all you can to be a musician as well as a music teacher.

9. Practice and improve

There is always something new to learn in music. Never stop learning and improving! Make sure you practice – practice what you preach to your students. I also see recording music to a click as practice, and you are also getting a physical end result from it.

10. Keep a contact list of all pupils or parents of pupils

I use mailchimp as my registration form (this was implimented to be GDPR compliant in 2018), and I transfer these to google contacts so I can stay in contact about lesson times and news etc. I group them by instrument, and also by which school they have lessons in, or if they have non-school lessons. Emails are the best method of contact I think because you can send to many all at once easily, most people use email now, it is free, and you can attach things. In fact, parents started to request invoices to be emailed, so I switched to that too. Phone calls are inconvenient to many now, texts are not as easy to send to everyone quickly, and facebook and twitter messages/updates are easily missed. However, texts are great (preferred) for late cancellations and last minute rearranging of individual lessons.

11. Invoicing Software

Jan 2019 Update: I have started using Quickbooks for my invoicing, because some off my emails sent from Gmail were going straight to spam folders, probably due to sending a pdf file to multiple BCC contacts. It’s also been quicker for me to create, send and chase up invoices. This is especially useful for teaching instrumental music lessons in schools where you invoice the parents directly, because you don’t usually see them in person.


I hope you have found some or all of these points useful and relevant to you. There are many other things I could write about in this list, and I hope to write another one in the future. Meanwhile, have a look around the internet for similar things as there are many helpful bits of advise. One website that I constantly find tips from for running a business, which I would recommend to you, is: www.entrepreneur.com

10 chord progressions in the key of D minor for guitar and ukulele

These 10 chord progressions in D minor are from my premium ebooks, 100 chord progressions for guitar and 100 chord progressions for ukulele ebooks.

The first sheet is for guitar, and the second for ukulele. They can be played together. Some of the chords are slightly different so that they are easier to play on each instrument – most of the chords are exactly the same on each sheet.


Guitar

The Sheet:

The Chords Reference Sheet:

Ukulele

The Sheet:

The Chords Reference Sheet:


Related (Premium): 100 chord progressions for guitar
Related (Premium): 100 chord progressions for ukulele

(Premium) – Ukulele Ebooks: 100 beginners chord progressions + 100 strumming rhythms

Buy Now →

These ebooks have been created after 6 years of teaching guitar and 1 year of ukulele. They follow on nicely from the premium ebook ’50 Ukulele Exercises’.

I have used my knowledge of how students learn chords, where they struggle the most, and what is needed to develop with rhythm playing and chord playing. The combination of these sort of chord progressions along with different strumming patterns is one that I have tried and tested, and have now compiled into a range of printable ebooks that can be used side by side to help many beginner guitarists and ukulele players improve their chord changing and rhythm playing.

People that might find these books useful

  • Ukulele teachers can print the book for their students.
  • Beginner ukulele players can work through the book with the help of a teacher
  • Some ukulele players may be able to work through the book on their own

Page 2 – Contents
Page 35 – Introduction
Page 6 – 10 Chord Progressions in A major
Page 7 – 10 Chord Progressions in A using A7, D7 and E7 chords
Page 8 – 10 Chord Progressions in A minor
Page 9 – 10 Chord Progressions in C major
Page 10-  10 Chord Progressions in D major
Page 11 – 10 Chord Progressions in D minor – [View Sheet]
Page 12 – 10 Chord Progressions in E major
Page 13 – 10 Chord Progressions in E minor
Page 14 – 10 Chord Progressions in F major
Page 15 – 10 Chord Progressions in G major
Additional Sheet Beginners
Ukulele Chord Chart (21 chords)


Also Available for Guitar

View the Guitar version →

Blank Guitar, Ukulele and Bass Sheet Music For Hand Writing Guitar Tab or Chord Charts – Free PDF

Get Free PDF Download →

Download the free PDFs to get unlimited access to printing your own blank guitar sheet music. You can use this to hand write your own guitar chord charts, scales, melodies, solos, or for writing out the guitar tab for a song. Teachers can use these to write out guitar music for their students. Composers and arrangers can print these off in order to hand write a quick guitar score, using chord names or adding tablature numbers.

There are no annoying watermarks or footer text – it’s just plain blank guitar sheet music staves with no writing.

All we ask is that you don’t distribute the PDF file on any other website or via email – please just link to this page if you want to share it.

These are in the PDF file in full size:

10 Beginners Chord Progressions for Guitar or Ukulele

These chord progressions will help you practice changing chords, and prepare for playing actual songs. They will also give you ideas for creating your own chord progressions – all you need to do is change the order of some of the chords to make your own.

If you need to know how to play the chords, check out the Chords page for diagrams.

Here are the 10 chord progressions included on the sheet:

  1. C, Am, Em, G
  2. Em, G, Dm, Am
  3. D, Dm, C, G
  4. E, G, Am, C
  5. E, C, A, D
  6. G, C, D, G
  7. A, D, A, E
  8. Em, Am, G, C
  9. Em, Am, C, D
  10. Em, D, Am, C

On the notation, it appears that you should play each chord 4 times. These should all be down strums. However, when this has been mastered, it is a good idea to try out different strumming patterns for these chord progressions.

Grade 3 level guitarists could use these chord progressions to practice their barre chords.


Related: 100 beginners chord progressions & 100 strumming patterns for Guitar (Premium)

Related: 100 beginners chord progressions & 100 strumming patterns for Ukulele (Premium)

5 guitar and ukulele chord progressions in A major with strumming – Essential Beginners and Grade 1 – 2

About the sheets

The rhythms mainly work with 8th notes and quarter notes, so playing the 8ths with a down, up strumming pattern, and the quarter notes with down strums would be a good way to strum these exercises.

Some of the notes and rests may be less familiar to beginners, so you might need to brush up on your note values with this reference sheet: Understanding Notes and Rests in Music Notation – Reference Sheet

Guitar

The A, D and E chords are used a lot in songs, so this sheet is a good way to practice changing between the chords, as well as working on rhythms.

Ukulele

The ukulele chords can be played by beginners, and more advanced players could substitute the Dsus2 and E7 chords for the full D and E chords if they wish.


If you found these free chord progressions useful for learning or teaching with, please check out my guitar and ukulele ebooks with 100 chord progressions in each:

(Premium) 100 beginners chord progressions for Guitar – ebook

(Premium) 100 beginners chord progressions for Ukulele – ebook

(Free ebook) – 10 Grade 1-3 Guitar & Ukulele Chord Exercise Sheets – Build up Confidence & Skills with a Small Collection of Easy Chords

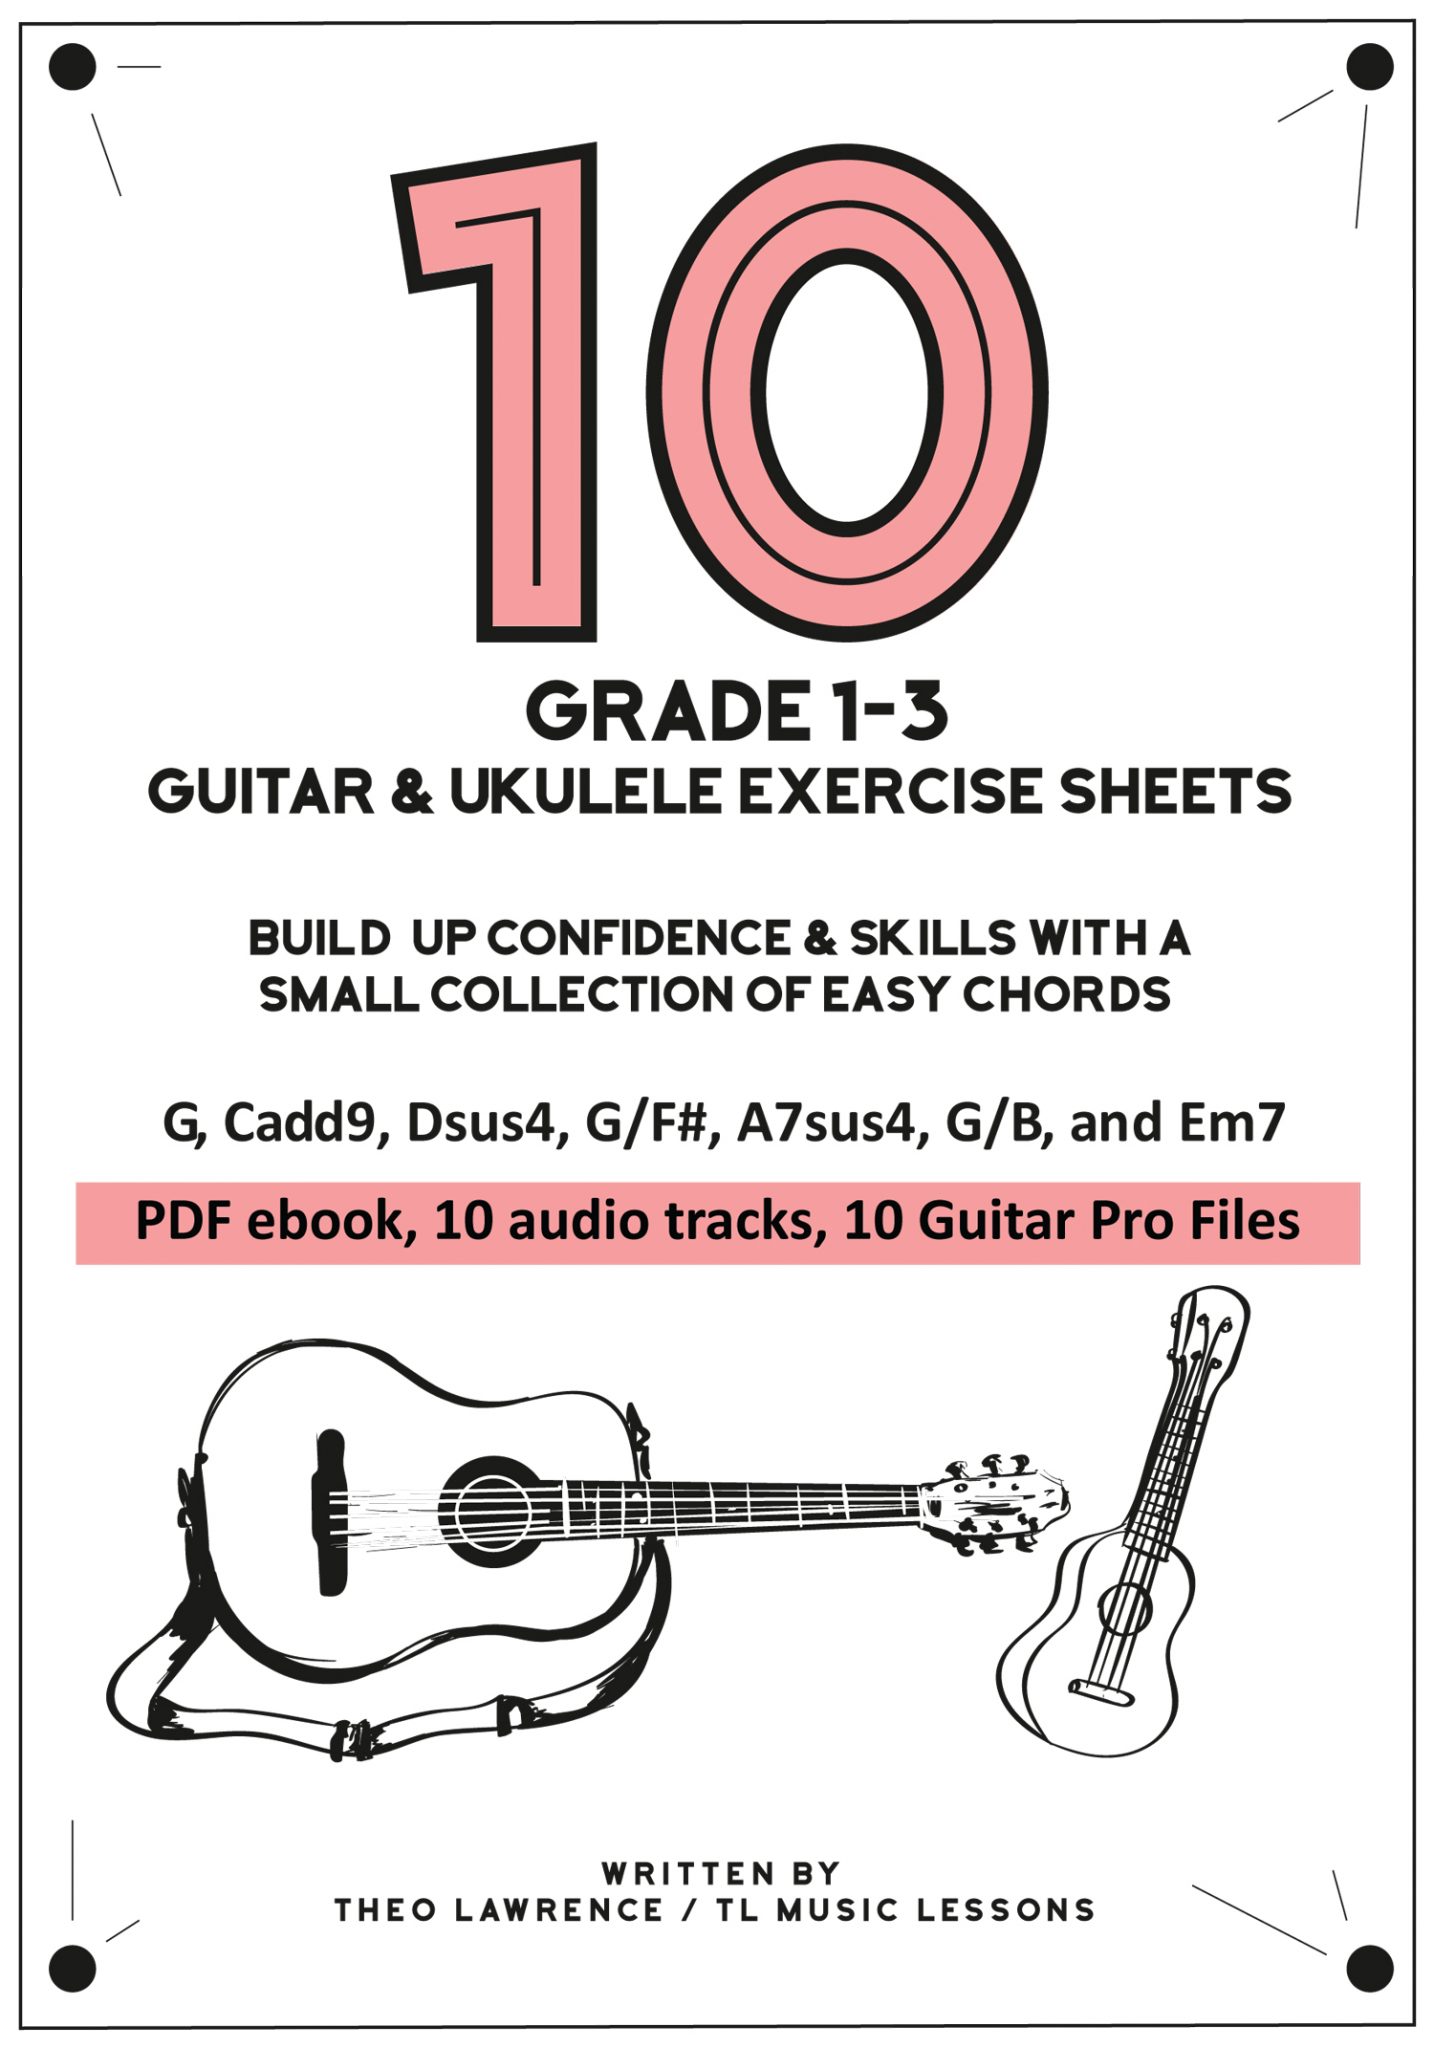
Originally posted as 10 seperate blog posts, they are now all contained here on this page. go ahead and download the free ebook, listen to the audio examples below (or from the download) and read the description of each exercise below as you go through it.

Get Free Downloads (PDF, MP3, Guitar Pro) →

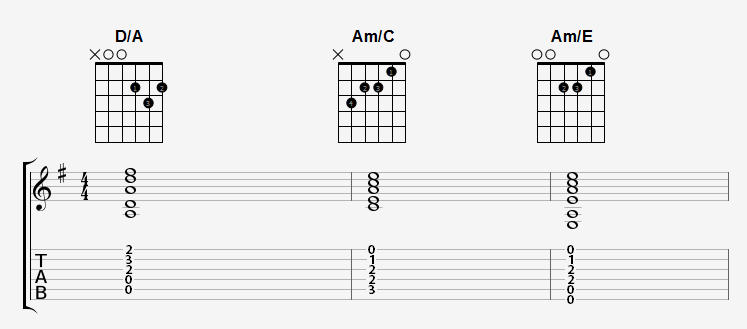
The 7 chords in this ebook are heavily used in pop and alternative music and are a fundamental set of chords to learn and be comfortable playing together in various sequences and with different strumming rhythms. They are also often used in different Capo positions on the Guitar. Some of the chords are more used than others out of the 7, but I think they are all very useful to learn.

This course of 10 exercise sheets will take you from grade 1 to grade 3 quite quickly and is primarily aimed at those around the grade 2 or 3 level, especially those on the brink of being able to play along with some popular songs.

Listen to exercises 1-10


About the exercise sheets
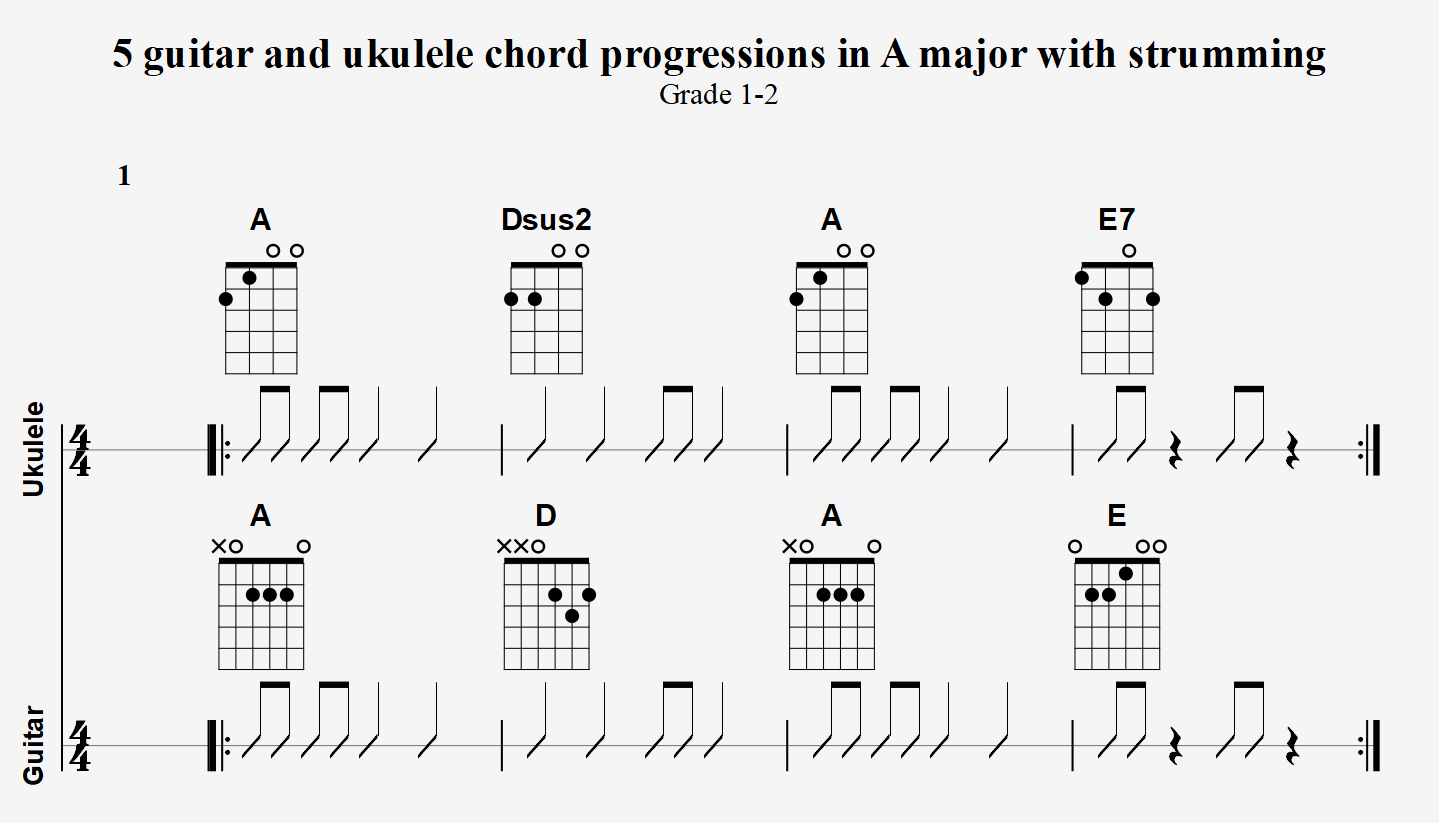
Sheet 1

Welcome to the first in the series of Chord Changing Rhythms with G, Cadd9, Dsus4, G/F#, and Em7 chords for Guitar and Ukulele.

These 5 chords are heavily used in pop and alternative music and are a fundamental set of chords to learn and be comfortable playing together in various sequences and with different strumming rhythms. They are also often used in different Capo positions on the Guitar.

In Exercise Sheet 1, we stick to the first 3 chords, G, Cadd9, and Dsus4. Let’s master these first.

In the next exercise sheet we introduce the Em7 chord and work on some new strumming rhythms.

Sheet 2

Welcome to the second in the series of Chord Changing Rhythms with G, Cadd9, Dsus4, G/F#, and Em7 chords for Guitar and Ukulele.

These 5 chords are heavily used in pop and alternative music and are a fundamental set of chords to learn and be comfortable playing together in various sequences and with different strumming rhythms. They are also often used in different Capo positions on the Guitar.

In Exercise Sheet 2, we introduce a 4th chord, Em7 to add to the G, Cadd9, and Dsus4 chords we started with in Exercise Sheet 1.

As with the other three guitar chords, you still don’t need to move your 3rd and 4th fingers. Whilst keeping your 3rd and 4th fingers on fret 3 of the the first two strings, all you need to do with Em7 is move the 1st and 2nd fingers into an Em position and you will now have Em7.

On the Ukulele, the Em7 is the same as the G6 chord. Both chords share the same notes. You can get away with this more on the ukulele as all the strings are quite high sounding so the root notes are not as prominent as the guitar.

By the way, if you are wondering what the symbols in bar 3 and 4 and again in 5 and 6 are, they mean to ‘repeat the previous two bars’. So, basically play the first line 3 times, then the 4th line, and then repeat it all again before playing the final bar.

Sheet 3

Welcome to the third in the series of Chord Changing Rhythms with G, Cadd9, Dsus4, G/F#, and Em7 chords for Guitar and Ukulele.

These 5 chords are heavily used in pop and alternative music and are a fundamental set of chords to learn and be comfortable playing together in various sequences and with different strumming rhythms. They are also often used in different Capo positions on the Guitar.

In Exercise Sheet 3, we re use the 4 chords from the previous exercise, Em7, G, Cadd9, and Dsus4, and develop different rhythmic skills in a new time signature of 6/8.

The rhythm is the same in every bar. It is not an easy rhythm, but once mastered will be enjoyable to play.

Sheet 4

Welcome to the fourth in the series of Chord Changing Rhythms with G, Cadd9, Dsus4, G/F#, and Em7 chords for Guitar and Ukulele.

These 5 chords are heavily used in pop and alternative music and are a fundamental set of chords to learn and be comfortable playing together in various sequences and with different strumming rhythms. They are also often used in different Capo positions on the Guitar.

In Exercise Sheet 4, we re use the 4 chords from the previous exercise, Em7, G, Cadd9, and Dsus4, and introduce a new chord, G/F#.

To play this new G/F# chord on guitar, you need to remove the top two fingers, and simply put the first finger on fret 2 of the 6th string. This finger should be held lazily so that it touches the 5th string. This will make the 5th string into a dead note, which means you play the string but no note comes out – it’s more of a hitting sound because the string is muted.

To play this new G/F# chord on ukulele, it’s more of a makeshift chord to fit the guitar rather than a true G/F# chord, because the F# isn’t actually the lowest note in the chord. It is actually technically a Gmaj7 chord, which has the same notes as G/F#.

The rhythm is the same in every bar. I have gone for a hard rhythm here, but it is a popular and familiar one so you should pick it up. Beginners might want to listen to the audio to pick up the rhythm rather than trying to read this one.

The rhythm changes at the end of every 4 bars – only one thing changes. Instead of doing the tied note (the fake down strum that doesn’t connect), we will strum this down. Listen to the drums, you will hear an extra bass drum on this 4th bar, which you can try and lock in time with.

The repeats are nested, which is a bit un common. This is so it fits onto the page and avoids the need to use D.C. markings, which some may not understand. Basically, play the first 4 bars twice, then the final 4 bars, and then play through everything again including the repeat of the first 4 bars.

G/F# slash chord explanation

This is a slash chord. The deepest note in the G chord is a G. The G chord is made up of 3 notes, G, B and D.

For G/F# we are replacing that lowest G note with an even lower note of F#, which is only 1 fret lower and therefore easy to play. Therefore, adding an F# is adding a new note to the chord. The note added is the 7th note in the G major scale, which fits because we are playing in the key of G. You can’t do this with every chord.

Usually the 7th note of G major would be played as a F diminished chord, using diatonic chord theory (you usually learn about this at grade 5 level). So, just adding the F# note onto a G chord is a good way of using that 7th major note, without the need for wrecking a chord progression by throwing in a diminished chord.

You can read more about slash chords here.

Sheet 5

If you got this far, it’s probably worth going to download the pdf ebook to view the rest, so I’ll leave off the images from this post for sheets 5-10.

Get Free Downloads (PDF, MP3, Guitar Pro) →

Welcome to the fifth in the series of Chord Changing Rhythms with G, Cadd9, Dsus4, G/F#, and Em7 chords for Guitar and Ukulele.

These 5 chords are heavily used in pop and alternative music and are a fundamental set of chords to learn and be comfortable playing together in various sequences and with different strumming rhythms. They are also often used in different Capo positions on the Guitar.

In Exercise Sheet 5, we re use only 3 chords from the previous exercises,G, Cadd9, and Dsus4. The exercises are getting harder though! There is a very quick rest after beat 3 on each bar, for only a quarter of a beat (16th note), and followed by 3 quick up picks with a 16th note speed, which then leads into a quick chord change to go into the next bar. The chord choices and style of playing was inspired by the song “We are never getting back together” by Taylor Swift. That song would be great to learn on the side of this series of chord changing with rhythm. The only other chord that it uses is Em. The picking is more complex than this, and the rhythm is different, but the chords are similar (in a different order).

The rhythm is the same in every bar. Beginners might want to listen to the audio to pick up the rhythm rather than trying to read this one.

Sheet 6

Welcome to the 6th in the series of Chord Changing Rhythms with G, Cadd9, Dsus4, G/F#, A7sus4, G/B, and Em7 chords for Guitar and Ukulele.

This selection of chords are heavily used in pop and alternative music and are a fundamental set of chords to learn and be comfortable playing together in various sequences and with different strumming rhythms. They are also often used in different Capo positions on the Guitar.

In exercise sheet 6 we have introduced 2 new chords. A7sus4 is the same shape as Em7 on guitar, but we just move our first 2 fingers down 1 string to make the shape. The G/B chord moves off Cadd9 in the same way that you would change from G to G/F# in previous exercise sheets.

This chord progression is in a 6/8 time signature. In each bar apart from the penultimate, the rhythm follows the 1, 2, 3, 4 rhythm with down strokes and then doubles up with “down, up” strokes on the 5 and 6. The second to last bar rhythm doubles up on the 2, 3 and 5, 6.

Sheet 7

Welcome to the 7th in the series of Chord Changing Rhythms with G, Cadd9, Dsus4, G/F#, A7sus4, G/B, and Em7 chords for Guitar and Ukulele.

In this session we take a break from the guitar pick and strumming rhythms, and focus on using a finger picking style with some of these chords. This can be very hard for beginners. I’ve slowed the tempo down a little to 70bpm. If you download the Guitar Pro 6 file (you need to have Guitar Pro installed), you can slow it down further.

We only use some of the chords in this exercise – G, Cadd9, Em7, Dsus4. We also use some notes like F# and B in the first section but we don’t play full chords with them. On the guitar they are used as bass notes.

For the second section you can see the p i m a markings above the music, which show you which fingers to use, and then continue for the following bars. Go here if you need to learn more about p i m a.

Sheet 8

Welcome to the 8th in the series of Chord Changing Rhythms with G, Cadd9, Dsus4, G/F#, A7sus4, G/B, and Em7 chords for Guitar and Ukulele.

In this session we start with some simple rhythms. The exercises are at a slower speed than in the previous session 8. After the repeats we have a complicated rhythm, so you’ll be glad of the slower tempo.

The tempo is very fast so you should start off slower before building up to this. If you download the Guitar Pro 6 file (you need to have Guitar Pro installed), you can slow it down further.

Sheet 9

Welcome to the 9th in the series of Chord Changing Rhythms with G, Cadd9, Dsus4, G/F#, A7sus4, G/B, and Em7 chords for Guitar and Ukulele.

In this session we take down the tempo and play a bit slower. The intro should be pretty easy but just make sure you are getting the timing right of the minims (half notes, worth 2 beats). The second section has a difficult rhythm so you’ll probably be glad of the slow tempo here.

If you would like to slow down or speed up the tempo, you can do this with the Guitar Pro 6 file (you need to have Guitar Pro installed).

Sheet 10

While the rhythms on this sheet probably go into Grade 4 territory, I recommend listening to the audio to get a grip on the rhythm and use the sheet for a guide for which up and down strokes to use.

4 Chord Progressions with Rhythm – Em – Essential Beginners – Ukulele & Guitar

These 4 chord progressions are all in the key of E minor.

The two bar repeating exercises only have 2 easy chords, and the rhythm is the same for each bar, so although we are working on rhythm and changing chords at the same time, these exercises are very accessible to beginner guitarists.

The chords have been simplified as much as possible, so instead of the standard G, C and D chords, they have been replaced with G6, Cmaj7, and Dsus2. These are all easier on ukulele and guitar, apart from the C chord on the ukulele, which is exactly the same amount of easy! Furthermore, these simplified chords still sound great, and do sound ok when played with the standard chords, so these could be used for other exercises or in songs, when struggling to play G or C for example.

GUITAR

UKULELE

A minor Chord Progressions Exercises – Grade 3

I wrote these chord progressions to help students with their Rockschool Improvisation (based on the 2012-2018 syllabus) practicing. I would also highly recommend getting their companion guides, which have official practice exercsies. My exercises are just as an add on to these practice examples, so you can get plenty of practice in (they are not endorsed by rockschool in any way).

You are free to play the chords as open chords or as barre chords – whatever you want. Barre chords would be grade 3-4 level, and open chords would be grade 1-2 level. For anyone not doing an exam, what you do need to do is improvise your own rhythms to make things interesting and to get the most out of the sheet. If there is 1 chord per bar, it will need to last for 4 beats, and if there are 2 chords per bar, you need to play those for 2 beats each.

For the actual rockschool exam though, you only need to follow the same rhythm for each Improvisation & Interpretation exercise, which can be found in the example in the grade book. In RGT, you would be required to develop your own rhythms.

You could extend these exercises into playing them in different styles, tempos, and time signatures (although all the Rockschool ones are in 4/4).

Whilst these chord progressions exercises were written for guitar, you could definitely use these for ukulele chord practice.


Related Post: G major Chord Progressions Exercises – Grade 3 →

G major Chord Progressions Exercises – Grade 3

I wrote these chord progressions to help students with their Rockschool Improvisation (based on the 2012-2018 syllabus) practicing. I would also highly recommend getting their companion guides, which have official practice exercsies. My exercises are just as an add on to these practice examples, so you can get plenty of practice in (they are not endorsed by rockschool in any way).

You are free to play the chords as open chords or as barre chords – whatever you want. Barre chords would be grade 3-4 level, and open chords would be grade 1-2 level. For anyone not doing an exam, what you do need to do is improvise your own rhythms to make things interesting and to get the most out of the sheet. If there is 1 chord per bar, it will need to last for 4 beats, and if there are 2 chords per bar, you need to play those for 2 beats each.

For the actual rockschool exam though, you only need to follow the same rhythm for each Improvisation & Interpretation exercise, which can be found in the example in the grade book. In RGT, you would be required to develop your own rhythms.

You could extend these exercises into playing them in different styles, tempos, and time signatures (although all the Rockschool ones are in 4/4).

Whilst these chord progressions exercises were written for guitar, you could definitely use these for ukulele chord practice.


Related Post: A minor Chord Progressions Exercises – Grade 3 →

Choosing the right size acoustic guitar or ukulele

Take a look at this picture and you will see the size difference for each guitar. From Left to right, the guitars are Concert Ukulele, 1/2 size guitar, 3/4 size guitar, full size guitar. Apologies that the full size acoustic is on a stand, but it has a curved back so it doesn’t stand up on it’s own. I hope you will find this useful. The ukulele is a concert size – you can also get a smaller ‘soprano’ size, but they aren’t much different. Anyone could play either size really. If buying for someone very young, then a soprano would be the better choice. If buying for an adult, a soprano would be fine too really – they are both playable. The main playing difference here is the size of the frets, and the length of the fretboard. There is also a little difference in the sound due to the size difference.

I believe that if in doubt, buy a 3/4 size guitar – but read on for more info.

Most adults play a full size guitar, but just look at the type of guitar size that Ed Sheeran uses – his is only a 3/4 sized guitar, and he does pretty well playing it!

Generally, I would say that year 1-2, or possibly year 3, would be best to have a 1/2 size, and anyone from year 3 or 4+ would be fine with a 3/4 size. Anyone in high school would be fine with a 3/4 or a full size – but if they are quite small, 3/4 might be a better choice. Having said this, I have taught quite a few girls and boys in year 5 and 6 who have a full sized guitar and manage just fine. There are no rules really – you should head down to your local music shop and try out some different sizes, and if you are buying for someone else, ideally take them with you and get them to try out different sizes. If you are buying a guitar as a gift then hopefully my advise has been helpful to you. Remember; if in doubt, go smaller.

The main differences between a 1/2 size and a 3/4 size is that the body is smaller, the neck is a bit smaller, and the strings are a bit closer together – this makes the 1/2 size perfect for kids with small hands and small fingers, because they will find it easier to play. They will however grow out of this size, and find it difficult to play when their fingers get bigger or longer.

The main difference between the 3/4 and the full size is the width of the body, and also the depth, meaning that they can be tough to hold comfortably for smaller people. There are different types of full size acoustics too – I quite like the rounded back on mine, because some of the bigger guitars are quite chunky and uncomfortable – particularly if you are using it all day to teach with like me. There can be a trade off with sound though – usually the bigger the guitar, the richer and more rounded the tone is.

Ukulele

The ukulele on the left is a concert size, and the ones on the right are both Soprano.

Chord inversions, Slash Chords, Alternative Bass Notes – A quick explanation

You may have seen chords like Am/C or G/F#. You may have just learned the chord without understanding it. You may have panicked and not played it.
Here is a quick explanation of how it works

The first part of the slash chord is the main chord being played. Some of the slash chords add a lower note, and some take away the lowest notes and replace them with the second part of the slash.

For example, on Am/C, it’s mainly the Am that’s being played, but with an added C note. In this case, the ‘A’ root note is not played, because you will play the C instead.

In another example, for D/A, you are mainly playing a D chord, but you also play the A string as the root note, so in this case no notes have been removed.
Is it an inversion?

An inversion is when you use one of the notes that make up a chord (eg. C E G = the C chord), and place one of those notes as the lowest note (e.g. play the low E string and you get C/E).
When is it not an inversion?

When you add a note that’s in the same key, but wasn’t in the chord initially. For example, G/F# is not an inversion; it’s just called a slash chord with an alternative bass note, because the regular G chord is only usually made up of the notes G, B and D. An inversion of G would be G/B or G/D.
Further Reading

There is some quite good info here that shows you various chords: http://www.scenicnewengland.net/guitar/chords/slash.htm


5 Ukulele and Guitar chord progressions in A major using A, D and E chords – Grade 1-2

Above, is the sheet for guitar.

Using 3 open major chords we have 5 chord progressions to practice. You could strum each one once, or maybe 4 times each, or make up your own rhythms.

You should look for any ‘cheats’ for changing the chords quickly. Rather than taking the fingers off completely for each chord change, look to see where the fingers need to navigate from and to for each chord. For example, from E to A on the guitar, the 1st finger needs to move up 1 string and 1 fret, so this is a simple diagonal movement.

If you found these free chord progressions useful for learning or teaching with, please check out my guitar ebooks with 100 chord progressions in each:

100 beginners chord progressions for Guitar


Ukulele

For the Ukulele, the hardest chord here is E. There are several workarounds for the “Horrific E major Ukulele chord”, but this is the one you should try and play first. It will take a while, and small fingers may not cope with this. I have included a sheet below for Ukulele beginners, which replaces the E chord with an E7 chord. E and E7 sound fine together, so you could play these chord progressions in a group with both ukulele and guitar players and they would still sound right.

If you found these free chord progressions useful for learning or teaching with, please check out my ukulele ebooks with 100 chord progressions in each:

100 beginners chord progressions for Ukulele

5 Beginners Guitar Home Recording Tips

Here are some tips that I wrote when I started out home recording. They will take you through some of the basics and logistic thoughts that you are likely to come across yourself.


  1. Neighbours – When I first started recording music I worried about upsetting the neighbours. Since starting recording however, I have come to realise that my neighbours are just as nosiy as me if not noisier. I have to contend with grass cutting, dogs barking, cars coming and going and passing by, shouting, wind chimes, kids playing and kicking footballs, hammering and general DIY out side, oh and a steam train that blows it’s whistle when it comes past our little country village. So when you sit down to record and start worrying about upsetting the neighbours with your recording levels, just remember these things, but try to be respectful of times of day you are recording and keep noise levels to a similar level to all the background noise you have to endure. It’s actually usually fine to record a guitar amp at a fairly quiet volume, so I’m not sure if anyone hears it anyway when I record. It’s more about recording the right sounds from the amp, and sometimes a lower volume will be better. Note that the closer the mic is to the amp, the bassier the sound, so you don’t want to fall into that trap of moving the mic closer to make up for low amp volume.
  2. Where to sit – If you are on your own, you need to be at the computer so you can stop and start quickly if you are recording on your own, so sit at your desk, or in front of your laptop wherever that is. This is not ideal because many movements, computer noise, and all mouse clicks will be heard if you are using a microphone in the same room. Make sure to leave time at the end of each recording before clicking that mouse! If you are recording an acoustic guitar, the mic can be placed a few feet away from the guitar with good results, so swivel your chair to the left or right from the computer, and set up your acoustic and mic there to the side.
  3. Amp / Mic Placement – As you are going to be sitting in front of your computer, you will need to put your amp in another room if you are using a microphone to pick up the sound, or at least as far away as possible in the same room as your computer. This goes for anything you are recording with a mic – get it away from the computer if you can. Ideally put the guitar amp in a room with the least ambient noise and run the cables under the door. For me it’s in a slightly noisier room than the one I sit in to record into the computer, but that’s just where my work station is for now. Ideally i’d love to go into a recording studio and have a dead room, but we can’t always have everything. If you are just demoing stuff there are no problems anyway, but if you are going to release anything you will want to carefully listen to the recording for any background noise and record it again if need be. It’s not the end of the world if you need to re-record especially if you consider you are not paying any studio fees; it’s only your time you are spending, and if you make sure to enjoy what you are doing and don’t pressure yourself, then it’s not time wasted and it’s all experience and learning.
  4. Time Constraints – If you are new to home recording, understand that it will take time to go through the process of writing songs, recording them, and then releasing and promoting them. If it is your first time, don’t set yourself a deadline to get it done, because you will probably get anxious and stressed and take longer than if you had no deadline. Don’t let the drive of wanting to make the music get in the way of enjoying creating the music and enjoying the process of recording it. It SHOULD be fun recording and writing music! I see recording music as a way of practicing and improving on my instrument, which has an amazing by-product of having something to show for it at the end. It’s much more rewarding than practicing scales to a click (keep doing that though)! The more you go through the writing and recording process, the more experienced and quicker you will be, so in the future maybe you can give your self a block of time to record a set of songs based on your past experience of how long things take, but I would still not recommend setting a deadline on your first few rounds of recording. Allow your self time to be creative and don’t get stressed doing something that should be fun. Sometimes you do need to grind out the mix to finish something off, perhaps you know you won’t have time to finish it for a long period of time. That’s up to you. There’s many ways of looking at it. I think though that if that’s your default method of working, or if you push yourself hard too often, there will come a time when you burn out and need to take an even longer break.
  5. Record a rough draft first – When you think you have come up with a song, record it roughly first using a DAW, with single guitar tracks. Record it with a click so you can copy and paste sections easily if the structure needs to change. When you are happy with the structure, you can then start doing things like getting the perfect guitar sound, double tracking guitars, making sure mics and amps are positioned properly and that the guitar is fine tuned. Often you will discard sections after rough drafts, so being able to chop them up and listen back to it on the computer is really useful. In the long run this is almost always the fastest way of recording a song, even though it seems like you are adding in an unneccesary step. Otherwise, you tend to record many more of the ‘perfect sounding’ takes to get the song finished.

Relative minor and relative major theory summary

Natural minor scales consist of 7 different notes, and the same goes for major scales.Some major and minor scales have the same notes as each other, but start on different notes, making them different key signatures. These are relative keys. For example, the C major scale uses all the same notes as the A natural minor scale. On the piano, only the white keys are used for these two scales. For C major, you would start on a C and play ascending notes up to the next C, using only the white keys. For A minor, you would do the same but starting and ending on an A note.

  • C major scales have these notes: C, D, E, F, G, A, B, C
  • A minor scales have these notes: A, B, C, D, E, F G, A
  • Notice both scales use the same notes, but start on a different note.

‘A minor’ (also known as ‘A natural minor’), is called the “relative minor” of ‘C major’, because they are related in terms of using exactly the same notes. Or you could say, C major is the relative major to A minor. Sometimes these can be used in the same song because they fit together. For example, ‘Run’ by Snow patrol plays in the key of A minor for the verses, but then bases the chorus around the C major key, and it works because all the notes and chords in both keys use exactly the same notes, but are just centered in a different place.

Accents

Accents are where you play notes or chords a bit louder. It enables the dynamics for a section to stay the same, but highlight certain notes as being a bit louder. They are used by all styles of music, and are a good way to add dynamic rhythm. For example, to make a driving rock groove, you could play 8th notes (1 + 2 + 3 + 4 +), and accent only the numbers. Heavily accented notes can be used for stabs, or ending notes.

Accents are displayed on sheet music as a right arrow > symbol, or as an upward arrow for a heavily accented note.

Understanding Notes and Rests in Music Notation – Reference Sheet

Get Free PDF Download →

This is a very useful sheet that will help students of most instruments that read music. The sheet includes images or rests and notes, and their modern or classic names, and also note values and rest values.

This can be useful as a reference sheet for students to keep on your computer, phone or tablet, or you can also print it out and stick it on the wall or keep it somewhere handy.

Music Teachers are welcome to download this and print it for their students.

Subdivisions, Time Signatures and Cakes

Subdivisions is a general term that we usually use to describe various notes that are shorter than one beat, such as 8th notes, triplets, 16th notes, and all the rest. 1 beat crotchets (quarter notes) can be divided into halves to make quavers (8th notes). These 8th notes (quavers) can subdivided into 16th notes (semi-quavers) by halving them again. The largest note in music without using ties is a semibreve (whole note), lasting 4 beats. Everything smaller than this is divided up again and again, which are subdivisions of the initial division. 2 beat notes are an equal division of the 4 beats. Technically, I think anything smaller than this is a subdivision because it has been divided up more than once.

Lets use a simple cake example of how subdivisions work…


Subdivisions Cake Example

  • Imagine you have a rectangular cake weighing 4kg (whole note / semibreve), and you have 1 table to put them on to sell. The table represents 1 bar of music.
  • Cut this cake in half down the long length to make two shorter rectangles weighing 2kg each (half notes / minims)
  • Divide this up into quarters and you have 4 x 1kg square cakes (quarter notes / crotchets) sitting on the table.
  • If you cut these up again to sell as individual portions, you are making subdivisions. Cut up the first cake in half and they would be 500g each and be 8th notes (quavers).
  • Cut up the second cake into half, and then half again and you would have 4 pieces at 250g each. These would be 16th notes (semi-quavers).
  • For the 3rd 1kg cake, cut it into 4 250g pieces again (’16th notes’) and then cut each of those portions in half again – what are you left with?
  • That’s 8 pieces and they would be 32nd notes (semi-demi-quavers).
  • If you cut every one of the 4 cakes on the table into ’32nd notes’, how many pieces would there be on the table?
  • There would be 32 pieces of cake.
  • How many beats make up a standard bar of music (how many 1kg cakes did we put on the table)?
  • 4
  • So in music when you see a 4/4 time signature at the start of a piece, the top 4 means how many cakes, and the bottom number means how many cakes they were cut into. There would be 4 x 1kg cakes = 4kg
  • So, in a 6/8 time signature, that would mean there are 6 x 8th note cakes on the table (500g for each cake). 6 x 500g cakes = 4kg.
  • In a 3/4 time signature there would be 3 x 1kg cakes = 3kg. So here, the table has less cake on it! This is the same as saying there are 3 beats per bar (3 cakes per table).
  • In a 2/4 bar how many 1kg cakes?
  • 2
  • in a 7/8 bar, how much does the total amount of cake weigh?
  • 7 x 500g = 3.5kg (3 and a half beats worth of crotchets / quarter notes)